View

Which Building Materials Age Well?: A Guide for Design-Conscious Homeowners

Anyone can specify a material that looks good on the day the scaffolding comes down. The real skill — and the thing that separates a genuinely well-designed home from one that simply photographs well — is choosing materials that look better with time, not worse. A home that ages well saves its owners money, avoids the slow creep of maintenance regret, and only grows into its setting rather than fighting it.

This is something we think about on every project, whether it’s a contemporary extension to a period property in Herne Hill or a full new build on a larger Surrey plot. Here’s how we approach material choices designed to last, not just to launch.

Why Some Materials Age Well and Others Don’t

The materials that age gracefully tend to share a few qualities: they weather rather than deteriorate, they’re forgiving of the occasional knock or mark, and they were chosen with an honest understanding of how the local climate and setting will actually treat them over ten, twenty or fifty years — not just how they’ll look in a set of renders.

By contrast, materials that age badly are usually the ones chosen primarily for how sharp they look on day one: certain composite claddings that fade unevenly, render systems poorly detailed for our wet climate, or finishes that scratch, stain or discolour in ways that are difficult or expensive to put right. None of this means avoiding contemporary materials — it means specifying them properly, with a clear understanding of how they’ll perform in practice.
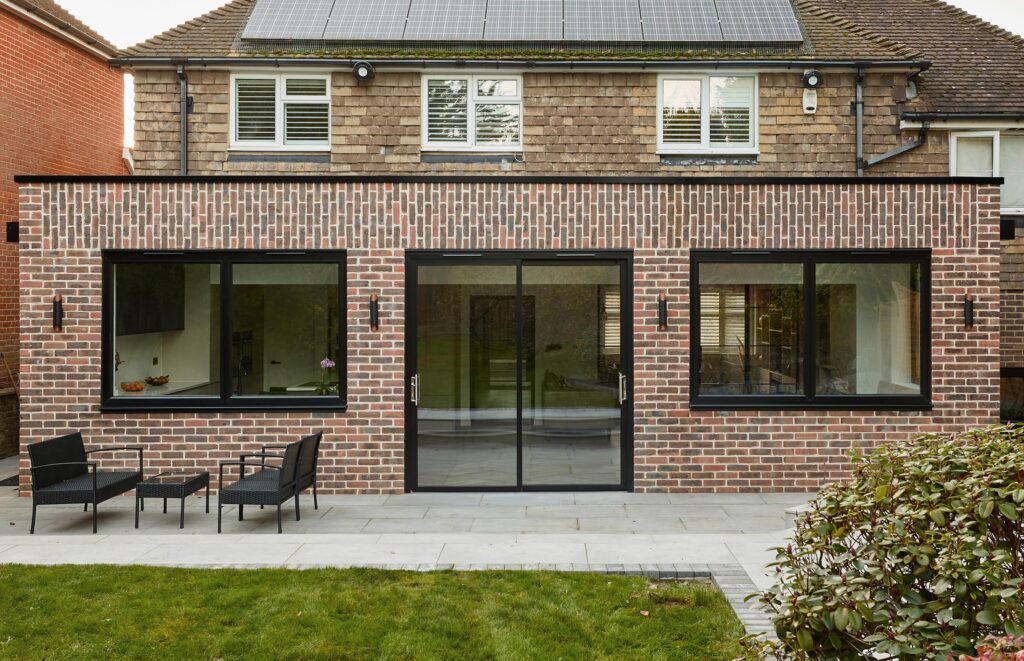
Brick: Still One of the Best-Performing Materials There Is

Brick’s enduring popularity across South London and Surrey isn’t accidental — it’s a material that genuinely improves with age, developing subtle variation and character over decades while remaining structurally sound for far longer than most contemporary alternatives. It’s also the material where a mismatch is most obvious, because the eye reads brickwork as a pattern, and any break in that pattern shows immediately.

Matching brick well is more involved than choosing something the same colour off a sample board. Four things have to line up:

  • Size — bricks laid before the mid-1960s are imperial, and typically a few millimetres deeper than the modern metric standard of 65mm. That difference is invisible in a single brick and glaring over fifteen courses, where the new work slowly drifts out of alignment with the old. Imperial-size bricks are still made, and on a period property they’re usually worth the premium.
  • Bond — a Victorian solid wall is often laid in Flemish bond, with headers and stretchers alternating in every course. A modern cavity wall is stretcher bond, because there are no through-bricks to express. Butting one against the other reads as a patch. Where the new work is prominent, snapped headers can reproduce the older pattern on a cavity wall.
  • Mortar — the joint accounts for around a fifth of the face of a wall, so mortar colour and joint profile affect the overall appearance at least as much as the brick does. A crisp grey bucket-handle joint next to a soft, flush lime joint will look wrong even if the bricks are a perfect match. On solid walls, lime mortar also matters technically: it lets the wall breathe and stays softer than the brick, so any movement cracks the mortar rather than the brick face.
  • Patina — new brick is uniform, and a century of soot, rain and sunlight is not. A yellow London stock that looks close in the merchant’s yard can read distinctly pale against the real thing. Reclaimed bricks solve the colour problem and bring their own — variable frost resistance, inconsistent quality, and stock that may have come from an entirely different part of the country.

Our standard approach is to build a sample panel on site, roughly a square metre, and look at it in daylight against the existing wall before anything is ordered in quantity. It costs very little, it settles arguments early, and in conservation areas it’s frequently a planning condition anyway. It’s also the point at which mortar can be adjusted — usually by changing the sand rather than the cement.

One honest alternative is worth mentioning. Where a close match genuinely isn’t achievable, a deliberate, well-handled contrast often ages better than a near-miss. A clearly different brick, separated by a recessed joint or a glazed link, reads as an intentional decision. A brick that is almost right reads as a mistake — and it will keep reading as one for as long as the building stands.
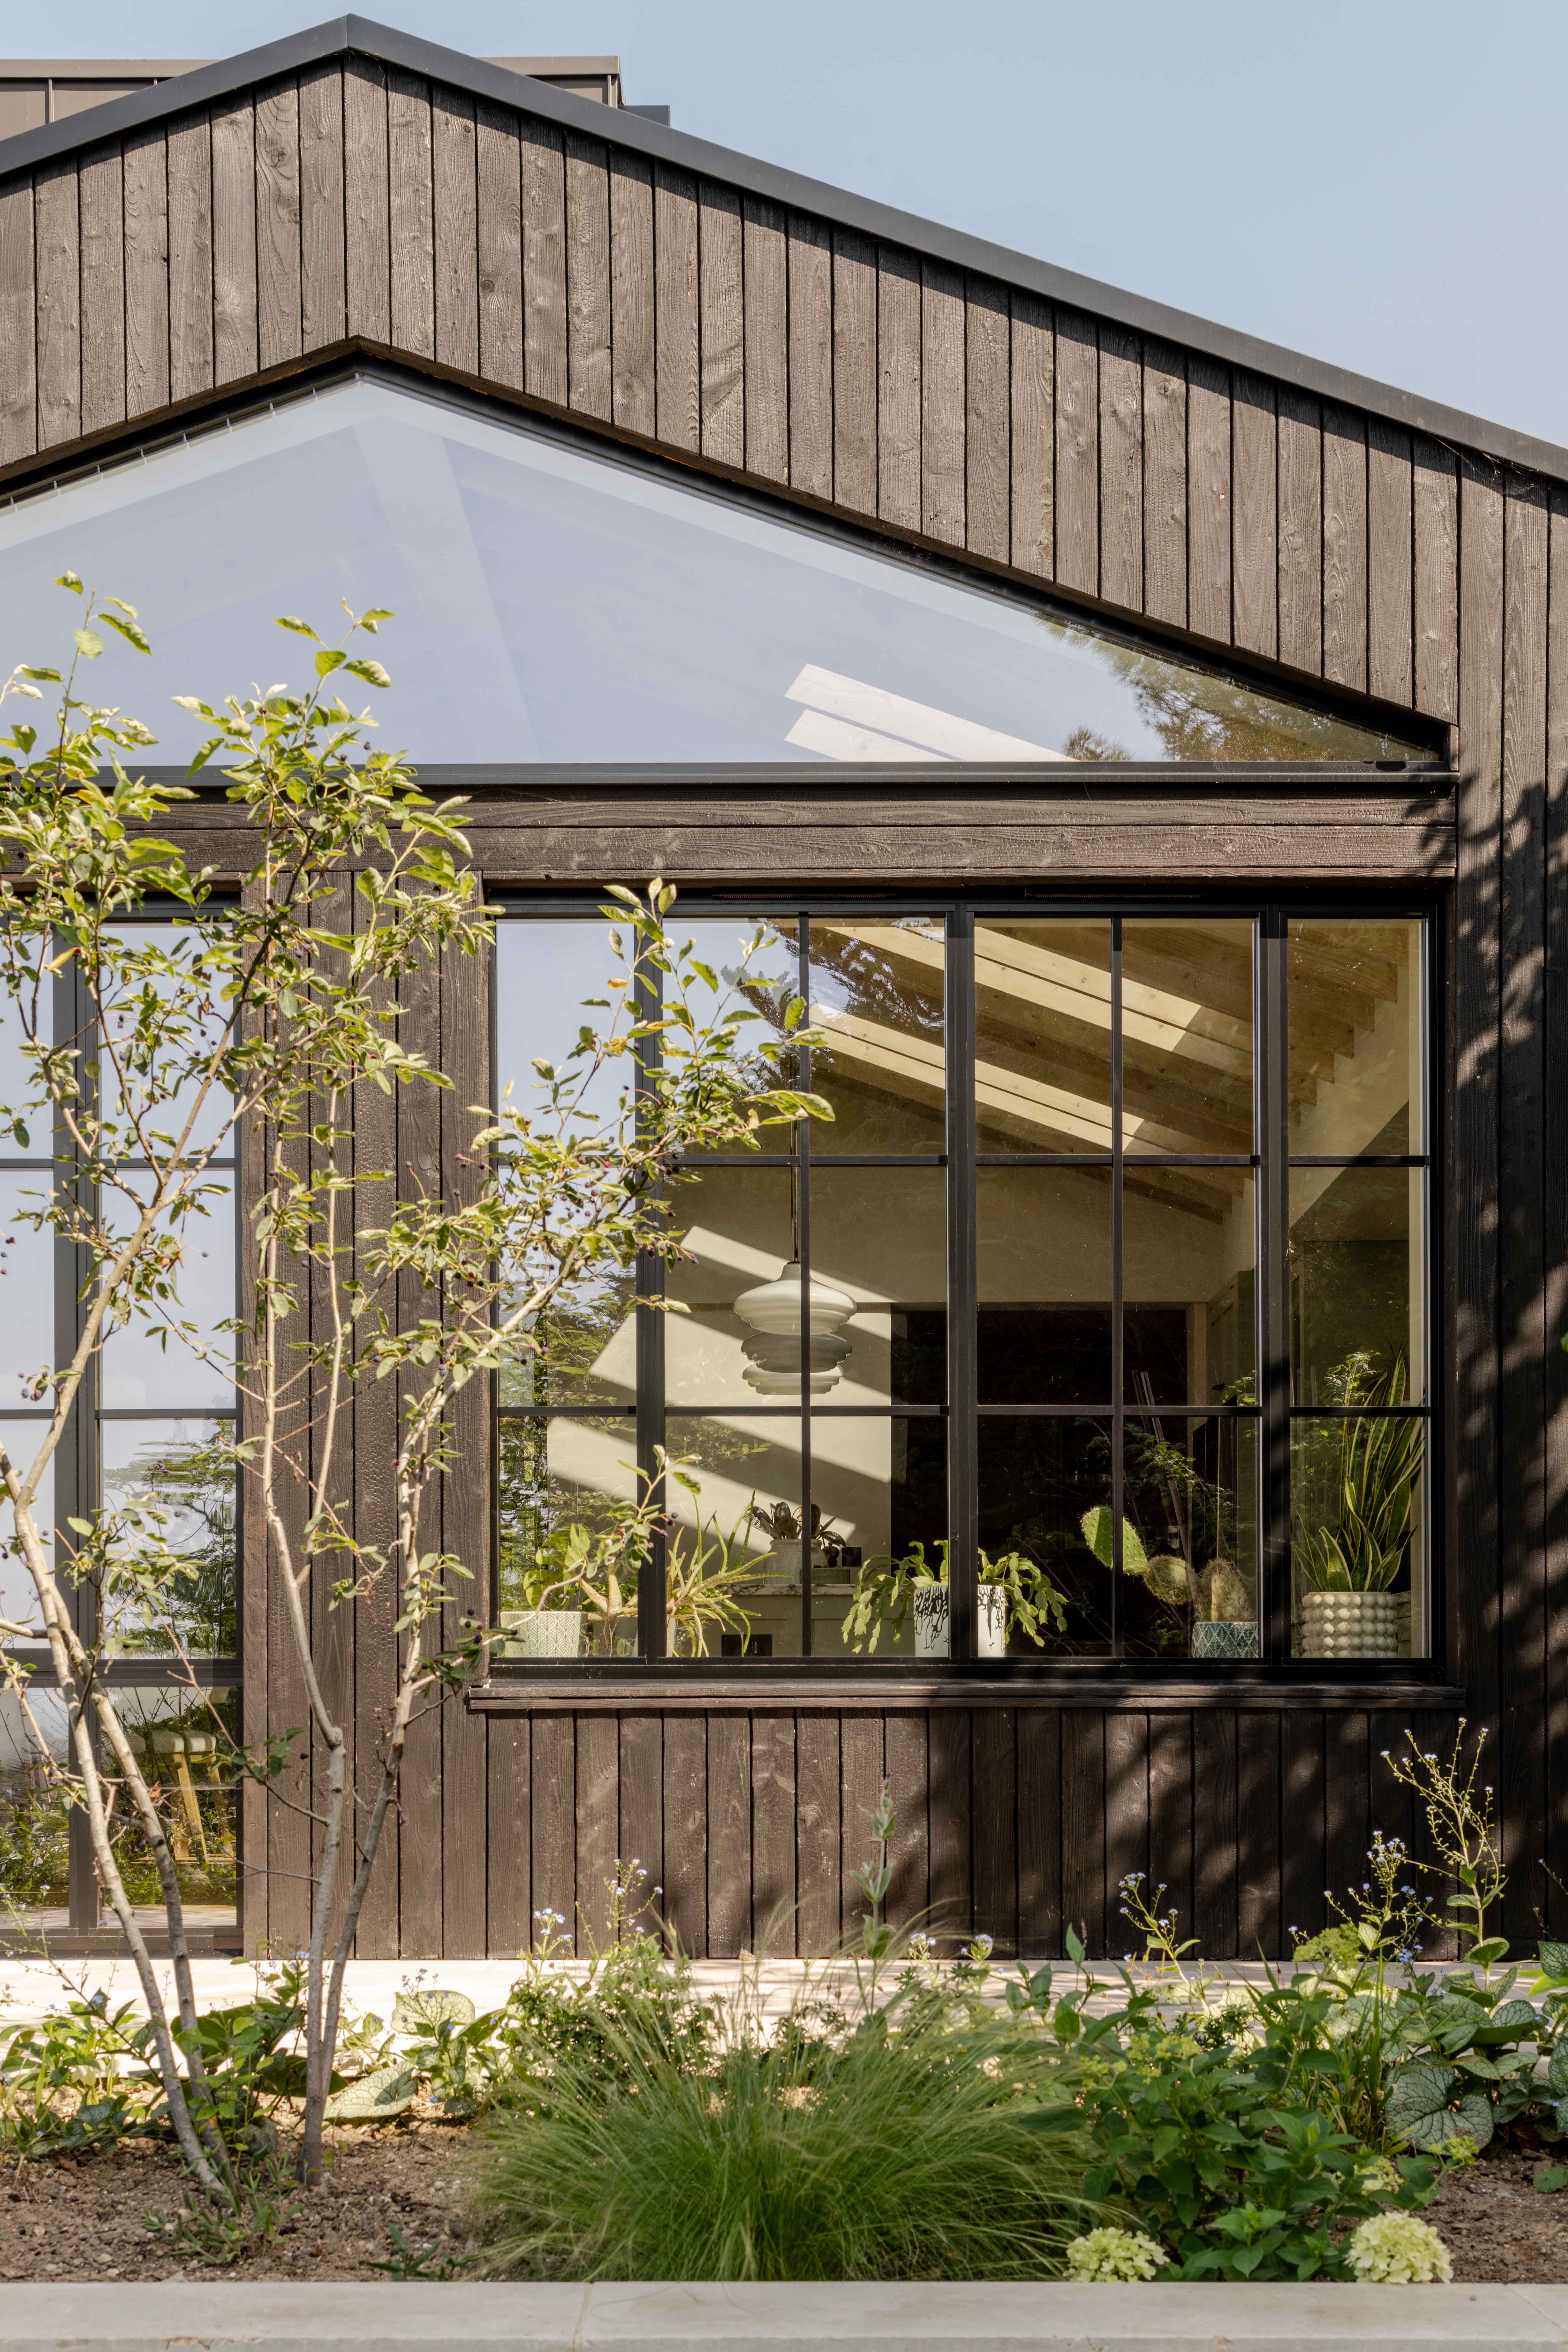
Timber: Beautiful, But Only With the Right Detailing

Timber cladding has become a hallmark of a lot of contemporary extensions, and for good reason — it’s warm, textural, and sits well against both period and modern architecture. But timber only ages well when it’s detailed properly:

  • Species selection matters — naturally durable, slow-grown timbers like cedar or larch weather predictably and attractively; poorly chosen softwoods can rot or warp within a few years
  • Detailing for water management — drips, ventilation gaps and correct fixing all determine whether timber lasts decades or needs replacing within five years
  • Deciding on the weathering look you actually want — silvered and grey, or maintained with periodic oiling — is a decision worth making at design stage, not after the first winter

Used well, timber cladding can look better after five years of weathering than it did on day one — which is exactly the kind of detail a rushed specification misses.
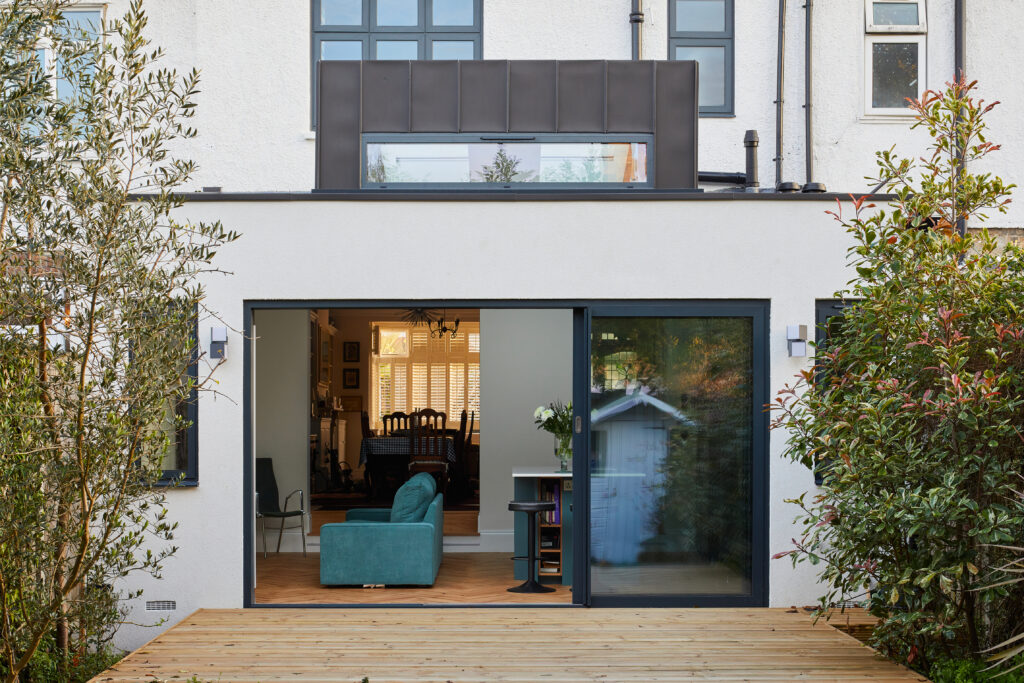
Render: Get the System Right, Not Just the Colour

Render can look crisp and contemporary, and it’s also the material most likely to disappoint if the system isn’t specified properly for the UK climate. Hairline cracking, staining and green algae growth are the complaints we hear most often from homeowners who’ve had render go wrong elsewhere. In almost every case the problem traces back to one of two things: the wrong system for the wall behind it, or detailing that lets water sit where it shouldn’t.

On the system itself, the choice matters more than the colour:

  • Sand and cement is the traditional option and the least forgiving. It’s rigid, so it cracks where the building moves, and it’s relatively closed, so on a solid wall it can trap moisture rather than letting it out.
  • Monocouche is through-coloured and applied in a single pass, which means no repainting — but it’s still cement-based, and it needs proper beads and movement joints or it will craze.
  • Silicone and acrylic thin-coat systems are flexible, applied over a reinforcing mesh, and far better at coping with movement. Silicone in particular sheds water well and resists algae, though the biocide in it isn’t permanent.
  • Lime render is the right answer on pre-1919 solid walls. It’s highly breathable, and it allows a wall built without a cavity or a damp-proof course to do what it was designed to do.

The detailing then decides how it actually weathers. Render needs to stop above ground level rather than running into the soil, with a bellcast bead to throw water clear. Sills and copings need a genuine overhang and a drip groove underneath — without one, every rainstorm sends dirty water straight down the face, and the streaking under windows that you see on so many rendered houses is entirely a detailing failure, not a material one. Reinforcing mesh belongs at the corners of every opening, set diagonally, because that’s where stress concentrates and where cracks start. And where render crosses from one substrate to another — new blockwork meeting existing brickwork, say — it needs either a movement joint or expanded metal lath, because those two materials will not move at the same rate.

Algae is worth a separate word, because it’s the thing people find most disheartening. It grows where surfaces stay damp: north elevations, sheltered corners, and anywhere shaded by planting or overhangs. Good drainage detailing and a silicone system will slow it considerably, but no render stays pristine forever in a British climate. A wall that will be permanently in shade is a wall we would usually suggest doing in something other than render.

Specified and detailed properly, render performs well for decades and can be redecorated rather than replaced. Specified on price alone, it’s the material most likely to have you looking at your own house with regret within five years.
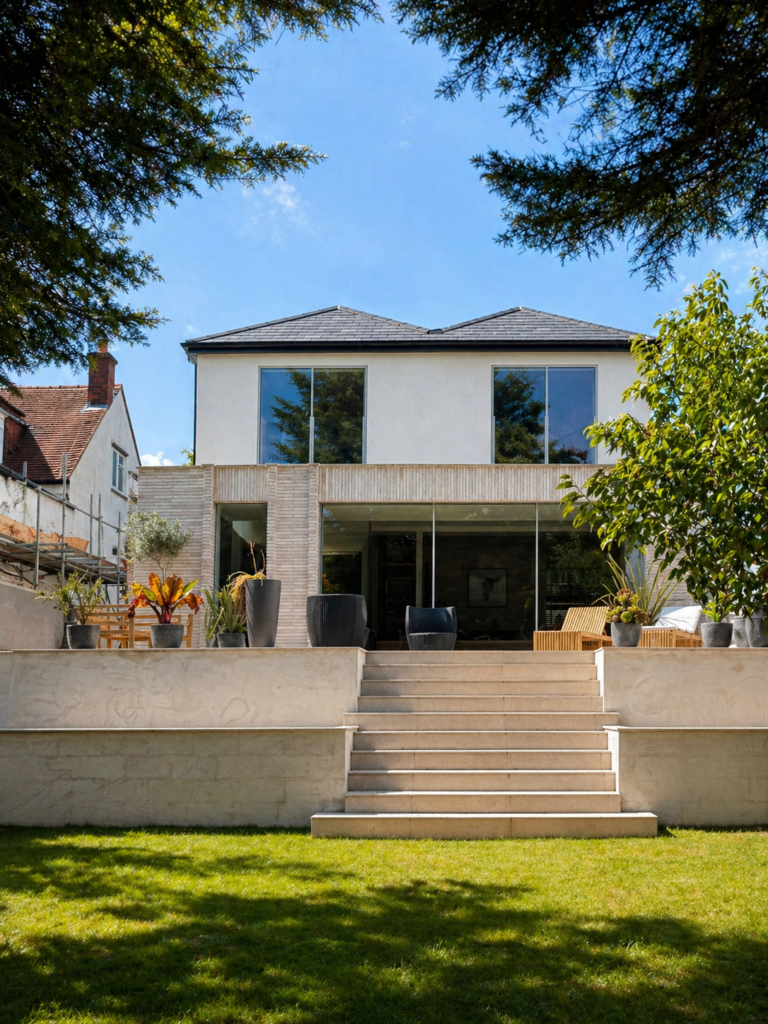
Stone and Natural Materials: An Investment That Pays Off Over Time

Where budget allows, natural stone — whether as cladding, paving, or a feature element — is one of the most reliably long-lasting choices available, ageing with genuine character rather than visible wear. It’s a material choice we often discuss with clients working on larger Surrey properties, where a bigger plot and a longer-term view of the home make the upfront investment particularly worthwhile.

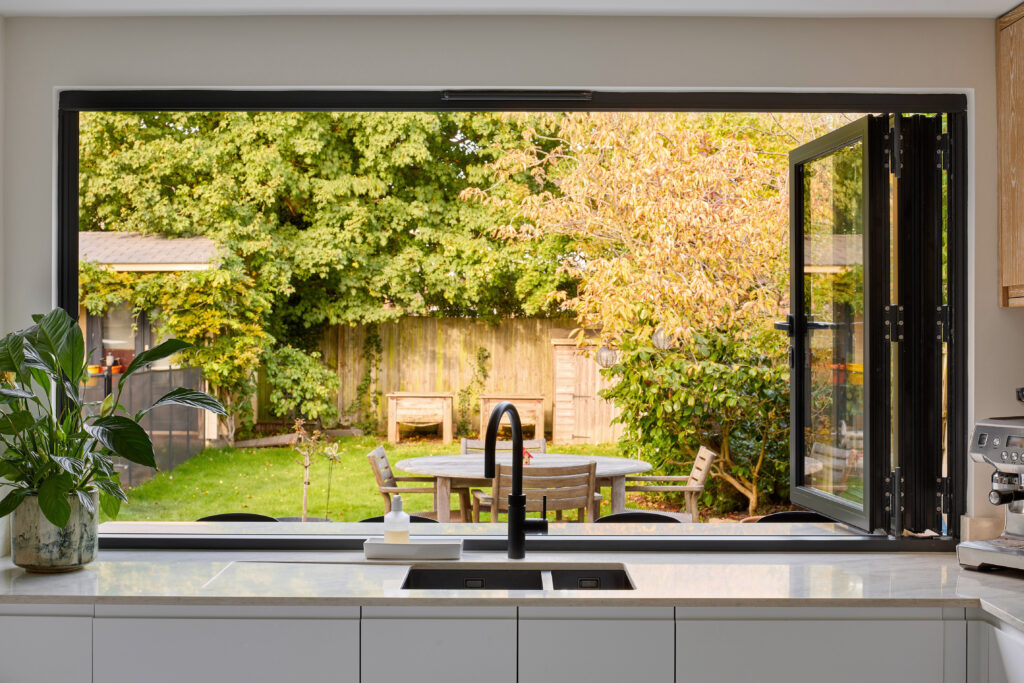
Architecture, interiors, design, interior design, chrissnookphotogrraphy, magazine, magazineinteriors, designer, interiortrends

Metal: From Statement Feature to Quiet Workhorse

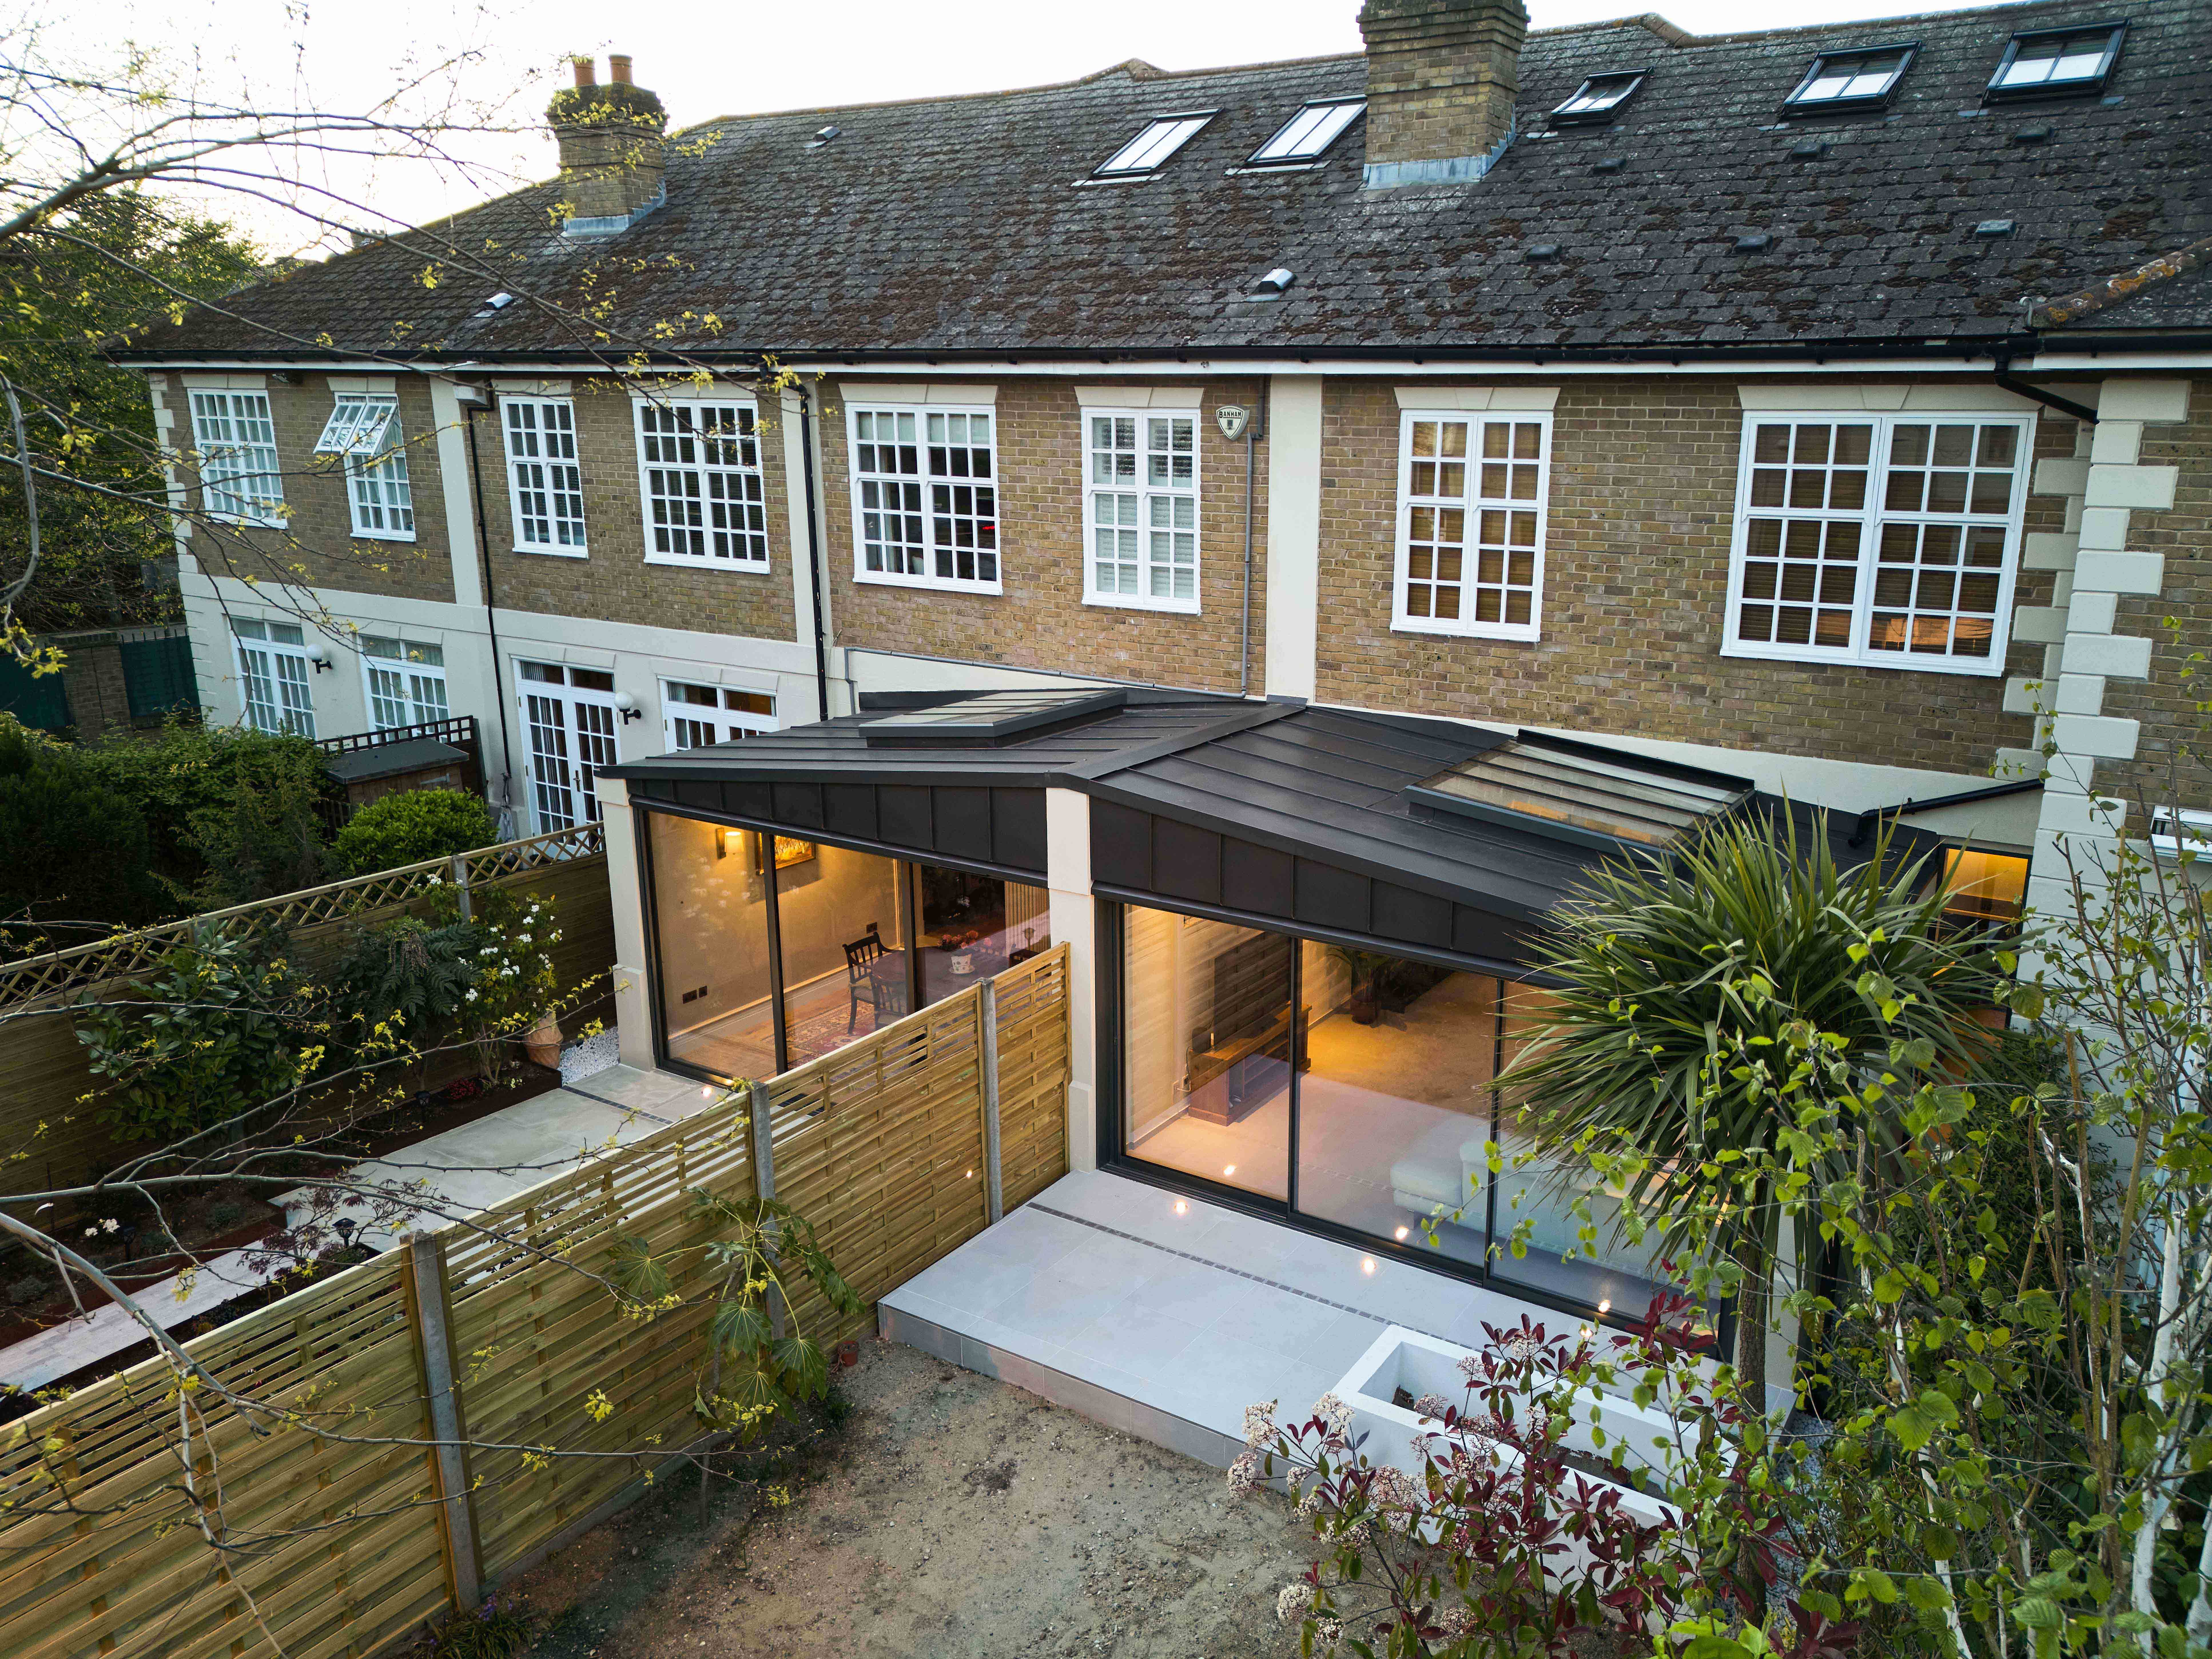
Metal roofing, cladding and detailing — zinc, corten steel, or powder-coated aluminium — can add a genuinely striking contemporary edge, and different metals age in very different ways. Corten develops a stable, protective rust patina that’s part of the design intent from the outset; zinc weathers to a soft, even grey; powder-coated aluminium stays crisp for years but is less forgiving of scratches. Choosing the right metal for the right application — and being honest with clients about how each one will actually look in ten years — is a conversation we have early, not after installation.

The Real Secret: Detailing, Not Just Material Choice

Here’s the thing most guides on this topic miss: the material itself is only half the story. How a material is detailed — the junctions, the drainage, the fixings, the tolerances — determines whether it ages gracefully or fails early, arguably more than the material choice itself. A high-quality material poorly detailed will age badly. A more modest material, properly detailed, can perform beautifully for decades. This is exactly the kind of detail-level thinking that separates a genuinely well-considered design from one that simply looks good in a planning application.

Choosing Materials That Suit the Setting, Not Just the Trend

The best material palette for any project isn’t a fixed style — it’s a response to the specific building, site and brief in front of us. A material that works brilliantly on a contemporary extension in Beckenham or Purley might be entirely wrong for a sensitive period property on the Dulwich Estate or in a Surrey conservation area like parts of Reigate and Caterham. This is exactly why we don’t work to a fixed house style: every material decision is made in the context of the specific project, the setting it sits within, and how our clients actually want to live in the finished home.

As a small, design-led practice, we take a genuinely hands-on approach to material specification on every project — visiting sites, understanding context, and having honest conversations with clients about how each choice will perform not just on completion day, but twenty years on.

Planning a renovation or extension and want a material palette that will still look right in twenty years? Get in touch to talk through your project, or take a look at our recent work to see how we’ve approached material choices across different homes in South London and Surrey.


Cherry Architects is a boutique architecture and interior design studio creating bespoke house extensions, refurbishments and new build family homes across South London and East Surrey.
Tandridge Planning: A Guide to House Extensions in Oxted & Caterham

There is one statistic that explains most of what happens to extension applications in this part of Surrey: 94% of Tandridge district is Metropolitan Green Belt — the highest proportion of any local authority area in the country. Add roughly 16% of the district under Area of Outstanding Natural Beauty or Great Landscape Value protection, 19 conservation areas and around 600 listed buildings, and you have a planning authority that says no to a great many things!

It also says yes, regularly, to well-judged proposals. The difference between the two outcomes is rarely ambition. It is almost always whether the design was tested against the right constraints before it was drawn.

We are a small, design-led architecture practice working across East Surrey and South London. This guide sets out how Tandridge District Council actually assesses house extensions in Oxted, Caterham and the surrounding villages — the Green Belt test, what permitted development still gives you, which policies your application is judged against, and what it costs in money and time.

The Green Belt test, and why “original” is the word that matters

If your home is in the Green Belt — and in Tandridge the odds are strongly that it is — your extension is assessed against a specific national test. The National Planning Policy Framework treats the extension or alteration of a building as not inappropriate development in the Green Belt, provided it does not result in disproportionate additions over and above the size of the original building.

Three words in that sentence do all the work.

“Original.” This does not mean the house as you bought it. It means the building as it was first built, or as it stood on 1 July 1948 for anything older. If a previous owner added a rear extension in 1995 and a garage conversion in 2010, both count against your allowance.

“Disproportionate.” There is no national percentage. Councils apply their own judgement, informed by local policy and appeal decisions, and the assessment considers volume, floor area, footprint, height and visual bulk together rather than any single measure. Proposals in the region of a 30–50% increase over the original are where the conversation typically gets serious; beyond that, the case has to be exceptional.

“Additions.” Detached outbuildings, garden rooms and annexes can be drawn into the calculation, particularly where they are functionally part of the house.

The practical consequence is that in Oxted, Caterham, Warlingham and Woldingham, the winning strategy is often not more but better: reorganising the existing plan, opening up a poorly used side return, adding height and light rather than metres, and spending the volume you do have where it transforms daily life rather than spreading it thinly.

What permitted development still gives you

Permitted development rights are not switched off by the Green Belt for householder extensions — an important point that is widely misunderstood. Green Belt policy governs planning applications; permitted development is a separate route. If your proposal fits within the permitted development limits, you do not need planning permission at all, Green Belt or not.

The main routes worth knowing:

  • Standard permitted development. Single-storey rear extensions up to 4m deep for a detached house or 3m for others, up to 4m high, with lower eaves within 2m of a boundary. Two-storey rear extensions up to 3m deep subject to conditions. Loft conversions up to 40 cubic metres for terraces and 50 for detached and semi-detached homes.
  • The larger home extension route. Single-storey rear extensions up to 8m deep for a detached house or 6m for others, via a prior approval application with a 21-day neighbour consultation. The fee is £249. This is now a permanent right, and in Caterham’s interwar and postwar housing stock it is frequently the most efficient way to get a genuinely useful kitchen and dining space.

The significant caveat is Article 2(3) land — conservation areas, Areas of Outstanding Natural Beauty and similar designations. On that land, side extensions lose permitted development status entirely, rear extensions of more than one storey are excluded, and cladding the exterior is not permitted. Roof extensions facing a highway are also out. With 19 conservation areas in the district and substantial AONB coverage across the North Downs, this catches a lot of Oxted and Caterham addresses.

Permitted development rights can also be removed by condition on a previous permission — very common on newer estates — or by an Article 4 direction. Always check the planning history of your own address rather than the general rule.

One strong recommendation: if you are relying on permitted development, apply for a Lawful Development Certificate before you build. It costs half the equivalent planning application fee, it gives you a formal determination that the works are lawful, and it is the document a buyer’s solicitor will ask for in ten years’ time. An extension built without one is not unlawful — but proving it is your problem, not the council’s.

Conservation areas, listed buildings and the Surrey Hills

Tandridge has 19 conservation areas and around 600 listed buildings, 20 of them Grade I. Old Oxted’s High Street, the older parts of the surrounding villages and pockets of Caterham all carry designations that change what is achievable.

In a conservation area, the test is whether your proposal preserves or enhances the character and appearance of the area. That is not a bar on contemporary design — a well-detailed modern rear extension behind a period house often preserves character far better than a poorly proportioned pastiche — but it does mean the street-facing elevation is treated as public property, and it means materials, window details and roof form get real scrutiny. Trees are also protected: you must give the council six weeks’ notice before works to most trees in a conservation area.

If your house is listed, listed building consent is required for internal as well as external alterations, and it is a separate consent from planning permission with no permitted development fallback whatsoever.

Worth watching: the Surrey Hills National Landscape boundary has not been reviewed since it was designated in 1958, and Natural England’s variation project proposes significant additions in this district — including areas identified as Limpsfield and Godstone Hills, Happy Valley, Caterham Woods and Woldingham Valleys. If your home falls within a proposed extension area, the designation would bring tighter permitted development restrictions and a higher landscape test. If a project is on your five-year horizon, this is a live consideration rather than a theoretical one.

Which policies your application is actually judged against

Tandridge’s adopted development plan is older than most people assume, and knowing what is actually in force matters when you are reading a case officer’s report.

The plan in force comprises the Tandridge District Core Strategy (2008) and Local Plan Part 2: Detailed Policies (2014–2029), adopted in July 2014. Alongside these sit the district’s neighbourhood plans, which carry full development plan weight in their areas:

  • Caterham, Chaldon and Whyteleafe Neighbourhood Plan (2025–2040), adopted June 2026
  • Woldingham Neighbourhood Plan (2016)
  • Limpsfield Neighbourhood Plan (2019)
  • Tatsfield Neighbourhood Plan (2024)

The Caterham, Chaldon and Whyteleafe plan is new, and if your home falls within it, its design policies are among the most current material considerations available. It is worth reading before you commission drawings rather than after.

Meanwhile the council is preparing the Tandridge District Local Plan 2024–2044, which reached Regulation 18 consultation on its spatial development strategy in the summer of 2026. It carries limited weight at this stage, but the direction of travel — particularly on Green Belt and design quality — is a useful signal for anyone planning a project over the next few years.

Two further points. Tandridge also publishes design guidance for specific settlements, including Woldingham, where plot ratios, tree cover and the low-density wooded character of the village are addressed directly. And Reigate sits in a different district altogether — Reigate and Banstead — with its own local plan and its own householder policies, so if you are comparing notes with a friend across the boundary, you are comparing different rulebooks.

Oxted and Caterham house types, and what works on each

Design guidance only gets you so far. What actually determines a good extension is the house you are starting from, and Oxted and Caterham have quite different stock.

Oxted runs from the timber-framed and tile-hung buildings of Old Oxted through Edwardian and interwar villas on generous, often sloping plots. Level changes are the defining challenge and the defining opportunity: houses that sit above or below their gardens respond well to extensions that step down, bringing the ground floor into a proper relationship with the garden instead of leaving it stranded a metre up. Roof form matters enormously here, because these houses are frequently seen from above or from the side.

Caterham on the Hill is dominated by interwar and postwar semi-detached and detached housing, typically on tighter but regular plots. These homes are almost always let down by the same thing — a narrow, dark rear kitchen separated from an unused dining room. The most transformative work is usually a modest rear extension combined with a serious replan of the existing ground floor, plus rooflights or a raised roof section to get daylight deep into the plan.

Caterham Valley has more postwar and later stock, often on steeply sloping sites where a lower ground floor is achievable without any increase in apparent bulk from the street — a genuinely useful move in Green Belt terms, because you gain floor area with limited visual impact.

Woldingham and the surrounding lanes are large detached houses on wooded plots, where the constraint is rarely space and almost always landscape character, tree cover and the village’s covenants.

There is a useful comparison with our South London work. A Victorian terrace in Herne Hill, Forest Hill or Dulwich has a side return and a fixed party wall on both sides — the design problem is light and width within a rigid envelope. A 1930s semi in Purley, Sanderstead or Beckenham has more room to move but a strong, repetitive street rhythm to respect. An Oxted villa on a sloping plot has neither of those constraints and a much harder landscape test instead. The principles carry across; the answers do not. That is precisely why we do not have a house style.

Beyond planning: what else will land on your desk

Planning permission is one consent among several, and the others catch people out:

  • Building Regulations. A separate approval covering structure, insulation, fire safety, ventilation and drainage. Required whether or not planning permission is.
  • Party Wall etc. Act 1996. If you are building on or near a shared boundary, excavating near a neighbour’s foundations, or cutting into a party wall, you must serve notice — typically two months ahead for party wall work.
  • Restrictive covenants. Common on Surrey estate developments, including in Caterham, Warlingham, Purley and Sanderstead, and administered privately rather than by the council. Woldingham’s covenants are actively watched over by the Woldingham Association. A covenant can prevent works the council has happily approved.
  • Trees. Tree Preservation Orders are widespread across the district, and conservation area notification applies separately. Where a proposal comes near a root protection area, commission an arboricultural report early rather than in response to a holding objection.
  • Drainage and surface water. On the chalk of the North Downs and the clay of the Weald, ground conditions vary sharply over short distances. Soakaway feasibility is worth establishing before the foundation design is fixed.

How we approach a Tandridge project

We are small deliberately. The person who walks round your house at the first visit is the person drawing it, sitting in the pre-application discussion, answering the case officer’s queries and standing on site when the steels go in. Nothing is handed down a line.

Our starting point is always the brief. The houses we design in Oxted, Caterham, Woldingham, Warlingham and across South London do not resemble each other, because the families living in them do not live alike. What they share is a method: careful listening at the outset, a fully resolved design in the middle, and a hands-on presence right through consent and construction.

On constrained sites — Green Belt, conservation area, covenant, or all three — that translates into three habits. We establish every constraint that applies before a line is drawn, including the original building’s footprint. We design to what the policy is genuinely trying to protect, rather than to the least generous reading of it. And we submit complete, well-argued applications, because a request for further information does not cost a week; it costs a determination cycle.

Thinking about extending in Oxted or Caterham?

If you own a home in Oxted, Caterham, Warlingham, Woldingham or Reigate — or across our South London patch in Dulwich, Herne Hill, Forest Hill, Purley, Sanderstead or Beckenham — the most valuable conversation is the earliest one, before a design exists to become attached to.

We would be glad to visit, talk through what you want the house to do, and set out honestly what is achievable within the constraints on your particular site. You can see how we have approached projects like yours in our projects section, or get in touch to arrange an initial conversation.

This article is a general guide and not planning or legal advice. Policy, fees and permitted development rights change — please confirm current requirements with Tandridge District Council and take advice on your specific property before making decisions.

Designing a Home to Survive a Heatwave

British summers have changed, and a lot of British homes haven’t caught up. If your house turns into a greenhouse every time the temperature climbs above 25°C, you’re not imagining it — much of our housing stock, from Victorian terraces to 1930s semis, was designed for a cooler, wetter climate than the one we’re now living in.

The good news is that a home doesn’t need air conditioning to stay comfortable through a heatwave. With the right design decisions — many of which cost little or nothing extra when planned in from the start — a well-designed extension or renovation can stay genuinely cool through even the hottest weeks of summer. Here’s how we approach it.

1. Think About Orientation Before Anything Else

Where the sun falls on your home, and when, should shape almost every other design decision that follows. A south or west-facing rear extension with a large expanse of glass will look wonderful in a design render and feel unbearable by 4pm on a July afternoon.

Good design starts by working out exactly how the sun moves across your specific plot through the seasons, then orienting glazing, rooms and outdoor space accordingly. A kitchen extension that faces north-east, for example, can often support far larger areas of glass without any overheating risk at all — while a south-facing extension needs a very different approach to shading and glass specification.

2. Get Serious About Solar Shading

Shading is one of the most effective — and most overlooked — tools for keeping a home cool, because it stops heat before it ever reaches the glass. Options include:

  • External shading devices — brise soleil, louvres or fixed fins positioned to block high summer sun while still allowing lower winter sun through
  • Deep window reveals or recessed glazing, which cast natural shadow across the glass for much of the day
  • Overhangs and roof projections, carefully sized using sun-angle calculations rather than guesswork
  • Deciduous trees and planting, which shade a building in summer and let light through once the leaves drop in winter

Internal blinds and curtains help, but they’re a last line of defence — by the time heat has passed through the glass, most of the damage is already done. External shading is far more effective, and it’s a detail we build into the design stage of every extension, not bolted on afterwards.

3. Choose the Right Glazing — Not Just the Biggest

Full-height glass and expansive bi-fold doors are a hallmark of a lot of contemporary extensions, and they can look genuinely beautiful — but glazing choice needs to be a deliberate decision, not a default. Two things matter most:

  • Solar control (low g-value) glass, which reduces the amount of solar heat passing through the glazing without significantly compromising light or views
  • Right-sizing the glazed area to the room’s orientation, rather than maximising glass everywhere regardless of which way it faces

This is exactly the kind of decision that benefits from a design-led, brief-specific approach rather than a one-size-fits-all solution — a large glazed extension can work brilliantly in the right orientation, and be a genuine liability in the wrong one.

4. Build in Thermal Mass

Materials like masonry, concrete and exposed structural slabs absorb heat slowly during the day and release it gradually overnight, which helps flatten out the extreme highs and lows a lightweight, glass-heavy extension can otherwise suffer. This is particularly effective when combined with night purge ventilation (see below), and it’s a strategy that works well across very different house types — from a Victorian conversion in Herne Hill or Forest Hill to a contemporary new build in Reigate or Woldingham.

5. Design for Ventilation, Not Just Insulation

Good insulation keeps heat out in summer as well as in during winter, but insulation on its own isn’t enough — a well-insulated, poorly ventilated extension can trap heat just as effectively as it keeps it out. The strongest results come from combining insulation with a proper ventilation strategy:

  • Cross ventilation — openings on opposite or adjacent walls that allow air to move through a space rather than sit stagnant
  • Stack ventilation — rooflights or high-level vents that let hot air rise and escape
  • Night purge cooling — opening the house up overnight to flush out the day’s heat before it builds up again the next day
  • Windows people can actually use — safely, easily, and without needing to leave a house unsecured overnight

6. Consider the Whole Home, Not Just the Extension

One of the most common mistakes we see is treating overheating as an extension-only problem, when in reality a new addition changes how heat moves through the whole house. A large, well-ventilated kitchen extension can inadvertently draw hot air into the rest of the home if the wider ventilation strategy isn’t considered together. This is one of the reasons we look at a project holistically from the earliest design stage, rather than designing an extension in isolation from the house it’s attached to.

7. Know When Mechanical Cooling Genuinely Makes Sense

None of this means air conditioning is never the right answer. For vulnerable occupants, for very dense sites with limited opportunity for cross-ventilation, or for renovations with real physical constraints, a small, efficient, well-specified system can be entirely appropriate. The key is that it should be the last layer of a design strategy, not the first — a well-designed home might only need mechanical support for the hottest handful of days each year, rather than relying on it as a substitute for good passive design.

Every Home Needs a Different Answer

There’s no single formula for a heatwave-proof house, because no two homes — or briefs — are the same. A Victorian terrace in Dulwich with a narrow plot and limited orientation options needs a very different strategy from a larger detached home in Caterham or Sanderstead. That’s exactly why we design every project around the specific building, site and brief in front of us, rather than applying a fixed template regardless of context.

As a small, design-led practice, we work closely and collaboratively with every client from the earliest stages of a project — which means climate comfort, orientation and ventilation are built into the design from day one, not treated as an afterthought once the drawings are already finished.

Planning an extension or renovation and want a home that’s genuinely comfortable in every season? Get in touch to talk through your project, or take a look at our recent work for examples of how we’ve approached this across different homes.


Cherry Architects is a boutique architecture and interior design studio creating bespoke house extensions, refurbishments and new build family homes across South London and East Surrey.

A Guide to Planning Permission on the Dulwich Estate

If you are planning an extension, a loft conversion or a full remodel on the Dulwich Estate, there is one thing worth understanding before you fall in love with a design: you will almost certainly need two permissions, not one.

Most homeowners in South London deal with a single gatekeeper — the local council. On the Dulwich Estate, the council is only half the story. The Estate operates its own consent system, the Scheme of Management, and it assesses your proposals against its own design guidance, on its own timetable, for its own fee. The two processes run in parallel and they do not talk to each other. Approval from one is not approval from the other.

We are a small, design-led architecture practice working across South London and East Surrey, and we have taken projects through the Dulwich Estate process, including a pair of neighbouring rear extensions on the Estate designed as a single coherent piece of work. This guide sets out how the Scheme works, what it expects of a design, how long it takes, and how we approach it — so that the process shapes your project early rather than derailing it late.

What the Dulwich Estate Scheme of Management actually is

The Dulwich Estate has been managed by charitable trustees for around four hundred years. Its land runs to roughly 1,500 acres across the boroughs of Southwark, Lambeth and Lewisham, and it takes in Dulwich Village, West and East Dulwich, Sydenham Hill and parts of Herne Hill and Forest Hill.

Until the Leasehold Reform Act 1967, most homes on the Estate were leasehold, and the Estate controlled their appearance through the terms of those leases. The Act gave leaseholders the right to buy their freeholds — which removed that control. To preserve the character of the area once those freeholds were sold, the Estate applied for and was granted a Scheme of Management by the High Court in January 1974.

The result is that around 4,000 freehold homes on the Estate remain bound by the Scheme. It runs with the land: it does not expire, it is not something you opt into, and it passes to every subsequent owner. If your home is on the Estate, you pay a small annual charge towards the running of the Scheme and you need the Estate’s written consent before you change the external appearance of your property.

This catches people out in two directions. Some owners assume that because they bought the freehold, they can do as they like. Others assume that because the council has granted planning permission, the matter is settled. Neither is the case.

A note for leaseholders. If you own a leasehold flat or house on the Estate, you sit under a different but parallel regime — you need a licence to alter from the Estate as landlord, with its own application requirements and fee scale. Structural changes, removing walls, replacing windows and installing boiler flues all typically require consent, even where the works are entirely internal.

Two permissions, one project: the Estate and the council

This is the single most important thing to grasp. The Estate is explicit that its approval “is separate from, and in addition to, the requirements of the local authority planning permission”, and that the two approvals are not connected — consent from one does not mean permission from the other will follow.

In practice, that produces three situations:

Works that need both. Most rear extensions, side returns, loft conversions with dormers, outbuildings of any size, and significant landscaping fall here. You are running two applications on two timetables against two sets of criteria.

Works that need Estate consent but not planning permission. This is the trap. Plenty of alterations sit comfortably within permitted development rights, or need no council involvement at all — replacing windows like for like, re-roofing, painting or repointing brickwork, installing solar panels, adding an EV charging point, changing a front boundary wall, taking down a tree. All of these can change the external appearance of the property, and all of them can require the Estate’s prior approval. A great many unauthorised works on the Estate are not extensions; they are windows and front gardens.

Works that need neither. Genuinely internal, non-structural work in a freehold house — a new kitchen, redecoration, replacing bathroom fittings — generally sits outside both systems. Structural alterations may still bring in Building Regulations and, if you share a wall, the Party Wall etc. Act 1996.

Our advice is always to establish the full permissions map at the outset, before drawings start. It costs almost nothing at that stage and it removes the risk of designing something that satisfies one authority and is unacceptable to the other.

Conservation areas, Article 4 and which council you are dealing with

Because the Estate straddles three boroughs, the first practical question is who your local planning authority is. Dulwich Village, East Dulwich and much of the Estate sit within Southwark; parts of Herne Hill fall to Lambeth; parts of Forest Hill and Sydenham to Lewisham. Each has its own local plan policies, its own householder design guidance and its own validation requirements. If you are on a boundary, check the address rather than assume.

Layered on top of that, much of the Estate lies within conservation areas, including Dulwich Village itself. Conservation area designation matters for three reasons:

  • Permitted development rights are curtailed. Side extensions, roof extensions and cladding generally lose their permitted development status, and there are tighter constraints on rear extensions and outbuildings.
  • Demolition of boundary walls and other structures can require consent in its own right.
  • Trees are protected. In a conservation area you must give the council six weeks’ notice before carrying out works to most trees — and on the Estate you will need a licence from the Scheme as well.

Southwark also operates Article 4 directions in parts of the borough, which remove specific permitted development rights that would otherwise apply. These are area-specific, so they need checking address by address rather than assumed from the postcode.

None of this means good contemporary design is off the table. It means the argument for it has to be made properly, in drawings and in writing, to two audiences at once.

What the Scheme’s design guidance actually asks for

The Estate publishes design guidance alongside the Scheme, and it is more prescriptive than most council householder policies. Understanding its instincts early saves a great deal of redrawing. The themes we work with most often:

Rear extensions. The guidance sets an expectation of modest depth and height — broadly in the order of three metres from the rear wall, and around three metres high to the parapet of a flat roof. These are starting points rather than absolutes, but a proposal that departs from them needs a clear design case and careful attention to daylight and neighbouring amenity.

Side extensions. The Estate is alert to the cumulative effect of infilling gaps between houses. Proposals that would close a gap entirely, or create a terraced appearance along a street of detached and semi-detached homes, meet resistance. Setting a side extension back from the front building line and down from the main eaves usually does more for a consent than shaving metres off the plan.

Windows and doors. Replacements are expected to match the original in material, proportion and detail. For homes built before around 1940, timber is the default expectation. Original leaded lights are protected — the guidance points towards secondary glazing rather than replacement units where thermal performance is the concern.

Roofs. Replacement roofing is expected to match the original material. Where concrete tiles have replaced clay historically, the Estate will often take the opportunity to return to clay. Slate, lead and copper are all accepted in the right context.

Materials and brickwork. Facing brick with appropriate pointing is the norm, and painting previously unpainted brickwork is discouraged. Contemporary materials — zinc, dark-stained timber, large glazed openings — are not prohibited, but they are held to a higher standard of design quality and are much easier to justify on a rear elevation than a street-facing one.

Boundaries and front gardens. Front boundaries are treated as part of the public realm. Hedges and soft landscaping are encouraged, with front boundaries typically kept low and rear boundaries more generous. Hardstanding for parking is scrutinised, particularly where it removes greenery or increases surface water run-off.

Trees. Tree works of almost any kind need a licence, and mature trees are among the features the Scheme exists to protect. Where a proposal comes near a root protection area, an arboricultural report is worth commissioning early rather than in response to a query.

Read together, the guidance is not hostile to ambition — it is hostile to proposals that ignore their setting. A well-argued, well-detailed contemporary rear extension has a far better chance than a poorly resolved pastiche.

The application process, step by step

The Estate’s process is more structured than many owners expect, and it rewards a complete first submission.

1. Pre-application conversation. The Scheme of Management Office will discuss proposals informally and confirm what needs consent. We use this stage to test the shape of an idea before it becomes a set of drawings.

2. Preparing the application. The Estate asks for a specific drawing package: existing plans and elevations, and proposed plans and elevations, at a minimum scale of 1:100 and no larger than A3, each single-sided and with a title block showing address, date, scale and drawing number. New work must be dimensioned and outlined in red. Ground levels and adjacent building lines need to be shown. You will also need a site location plan at 1:1250 with a north point, site photographs, and material and detail specifications for windows, doors and dormers. Supporting documents — design and access statements, daylight studies, arboricultural reports — are submitted as separate PDFs.

3. Validation and consultation. Once validated, the application goes out to neighbours and to the Estate’s advisory committee for a consultation period of around three weeks.

4. Assessment. The Estate’s own architect reviews the proposal against the design guidance, and a site visit is normally part of the process.

5. Decision. If the scheme complies with the guidance and no objections are received, a permit is issued. Where the proposal departs from the guidance, or where objections are raised, it is referred to committee.

6. Inspection and licence. The Estate surveyor inspects the works, and the final licence is issued once the completed work is found to be satisfactory. That last step matters: it is the document a future buyer’s solicitor will ask for.

Running alongside all of this, your householder planning application to Southwark, Lambeth or Lewisham has a statutory target determination period of eight weeks, which in practice frequently runs longer on constrained or contentious sites.

Fees and timescales

The Estate publishes a fee scale that is updated periodically, so treat the figures below as indicative and confirm the current rates before you budget. At the time of writing, freehold applications start from a minimum fee of around £142, replacement windows and doors are charged at around £348, loft conversions at around £865, and extensions and garden buildings on a per-square-metre basis. Leasehold licences to alter run on a separate scale.

Two points are worth emphasising. First, retrospective applications are charged at double the standard fee — the Estate takes unauthorised work seriously, and the financial penalty is the least of the consequences. Second, the Estate advises allowing roughly eight to ten weeks for an application to be processed. Run in parallel with an eight-week council determination and a realistic tender period, that is a meaningful chunk of your programme, and it belongs in the schedule from day one rather than being discovered in month four.

What happens if you build without consent

Because the Scheme is a legal charge running with the land, unauthorised works do not simply go unnoticed and expire. They surface — usually at the worst moment, when you come to sell and the buyer’s solicitor asks for evidence of Estate consent for the extension, the replacement windows or the driveway.

At that point the options are a retrospective application at double the fee and no guarantee of approval, remedial works to bring the property back into line, or an indemnity policy that a cautious buyer may not accept. We have seen sales delayed by work carried out in good faith by a previous owner who simply did not know the Scheme applied. The remedy is cheap at the start and expensive at the end.

Thinking about a project on the Dulwich Estate?

If you own a home on the Dulwich Estate and you are weighing up an extension or a whole-house remodel, the most valuable conversation is the earliest one.

We would be glad to look at your house, talk through what you want from it, and set out honestly what the consent route looks like before you commit to anything. You can see how we have handled projects like yours in our projects section, or get in touch to arrange an initial conversation.

This article is a general guide and not legal or planning advice. Fees, guidance and procedures are updated periodically — please confirm current requirements with The Dulwich Estate and your local planning authority before making decisions.

How to Get Planning Permission or Permitted Development

Planning or Permitted Development

Planning permission is a legal consent that allows you to build.

Many designs may not require planning permission as they are classed as permitted development.

Permitted development allows you to build straight away without permission however we recommend that you apply for a certificate of lawful development to ensure that what you are building is permitted.

Pre-Planning Application

If the design is particularly dissimilar to surrounding properties or contentious, it may require an outline planning application. This can be submitted when the design is at an early stage to understand whether it is worth continuing the design process in a certain direction. This is useful for larger buildings such as new build houses and blocks of flats, that will require a large amount of professional services before undergoing a full planning application. For smaller buildings and extensions, this is unnecessary as it takes longer than a planning application and costs more.

Pre-Planning Meeting

For large new build schemes or for proposals that may be tricky to get planning permission, it may be necessary to meet with the local planning department to discuss the scheme and develop a way forward. This is a service that we offer.

Planning Application

We produce a full planning application package, which consists of 2-dimensional drawings with the addition of rendered images and reports if required, depending on the nature of the project. If it is clear that an additional report is required from an external professional service, we will identify a company and deal directly with them.

We offer the production of the following reports:

  • Design and Access Statement
  • Flood Risk Assessment

We can submit the Planning Application to your local authority on your behalf and deal directly with any correspondence.

The council’s planning consideration process takes approximately 8 weeks for a straightforward project. Larger and more complex projects can take up to 13 weeks.

Planning Appeal

If the application is unsuccessful, we can arrange an appeal on your behalf. If the project requires resubmission, we can assess the reasons for the decision and prepare an alternative design in response for re-submittal.

Application for Lawful Development Certificate

If your project is classed as permitted development, we can prepare an application for Lawful Development Certificate to send to the local council. Please see the Appendix for information on permitted development criteria.

What do Architects do?

The role of an architects

Good building design can drastically improve the quality of a person’s life and their mental health. An architect can help transform how a person lives, no matter how large or small the budget; through designing quality spaces, with great consideration of materials, cleverly located natural light sources and spatial relationships that respond to the daily needs of the people inhabiting the space. 

The architect takes on a large amount of roles from investigating the legality of building work, negotiating building costs during the tender process, consulting and collaborating with a huge number of professionals and services on the client’s behalf, providing cost information, managing the building contract and managing the build process from start to completion.

The table below lists some of the many roles that the architect undertakes:

What do architects do?
The Role of the Architect

MythReality
Draws a building design for a builder to constructThe architect checks any title and any easements or land covenants that may restrict what can be built.
The architect analyses how the client occupies their living space and develops a design that responds to their spatial requirements and physical needs to improve their quality of living.
The architect ensures that the design conforms to local planning regulations and restrictions including any policies that preserve the historic or environmental characteristics of the local area.
The architect ensures that the building design is compliant with the building regulations and health and safety standards.
The architect creates visual representations of the design, through sketches, virtual models, 3D visualisation tools to allow the client to see and feel what the space will be like.
The architect leads and collaborates with a team of professionals including engineers, surveyors, designers, builders, planners, local council, financial professionals, manufacturers and trades people.
The architect produces coherent design and construction information including drawings, schedules and specifications that will enable the build cost to be accurately calculated and the building to be constructed.
The architect undertakes project management during the construction stage, including organising site visits and meetings, resolving site problems and calculating how much the client should be paying the builder each week.

How Cherry Architects Work

At Cherry Architects, we work closely with our clients at the start of the project to understand as much as we can about who they are, how they live and what motivates them. By getting to know each other, we are able to design spaces that best respond to their spatial needs.

Undertaking a construction project can be complex, particularly if you have not undertaken one before. At Cherry Architects, we aim to simplify the process as much as possible and guide our clients through all aspects of the design journey; always on hand to answer any questions that they may have throughout the process.

With many years of experience in the locations that we serve, we have good links to a vast network of local engineers, surveyors and builders and can make recommendations to ensure that our clients are always looked after.

Through using 3D visualisation and virtual reality technology, Cherry Architects are able to effectively communicate design ideas with our clients, who may be used to seeing design only on 2D plans or who may have never worked on a house extension before.

How to get a party wall agreement?

A party wall is a shared wall that divides the properties or gardens of two separate owners, where the dividing wall is built along the boundary of the two properties.  A Party Structure is a means of separating separately owned properties in the form of a wall or floor within an apartment block.

Party Wall Agreements/ Awards are required for any work on an existing party wall or structure or any excavation within 3 metres or 6 metres of neighbouring buildings. Most side and rear extensions and loft conversions will require a Party Wall Agreement.

Under the Party Wall Act, building owners have the right to:

  • Repair party walls,
  • underpin party walls,
  • raise the height of a party wall,
  • re-build unstable party walls,
  • add a Damp Proof Course to a party wall.

A building owner must have a Party Wall Award in place with their neighbour before any construction work that will affect the party wall can commence.

Party Wall Notice

A Party Wall Notice is the notice that the homeowner uses to communicate to their neighbour their intent to carry out works to or close to a Party Wall.  A Party Wall Notice should include the following:

  • The names and addresses of the owners
  • Address of the building under construction
  • A description of the works including drawings
  • Details of any demolition to be carried out
  • The proposed start date for construction

At Cherry Architects, we can assist you with submitting a party wall notice and put you in touch with a party wall surveyor.

Before issuing a notice, it is recommended to talk to your neighbour about the work first so that they have warning and can discuss any concerns in advance.

Work cannot commence until the expiration of the notice period. The notice period should be at least 2 months in advance of the proposed start date for work to an existing party wall/ structure and at least 1 month when a new party wall is being proposed.

 The neighbour can respond to the notice by either giving consent in writing or giving refusal in writing within 14 days of receiving the notice. For works to existing party walls, if the neighbour does not respond before 14 days or they refuse, they are deemed to be in dispute and a party wall surveyor should be appointed. For the proposal of a new party wall, if the neighbour does not respond before 14 days or they refuse, the works can still go ahead but should be contained within the building owner’s land only.

Notices are valid for one year; work must have started before the year is up to remain valid.

If there is a dispute, a party wall surveyor should be appointed to draw up a party wall award. The adjoining owner has the right to appoint their own surveyor, for which the building owner must cover the cost.  The neighbour can also request certain safety or security measures to be undertaken by the building owner to protect their property and should be compensated should any damage to caused.

The Party Wall Award

The Party Wall Award is drawn up by the surveyor, which outlines the scope of work and dates for the works to be carried out. This must also record the condition of the neighbouring property. the surveyor will be required to inspect the work periodically to ensure its compliance with the terms of the award.

How long does it take to build an extension?

Designing and building an extension often takes longer than most people anticipate.

The process involves several stages, including design, approvals, planning, and construction, each requiring careful attention to detail. It’s not a straightforward task, as challenges and delays can arise along the way. That’s why hiring an experienced architect is crucial. They will guide you through each step, from initial design to final construction, ensuring that the project stays on track, adheres to your vision, and remains within a realistic budget. With their expertise, you can avoid costly mistakes and achieve a design that meets both your needs and financial constraints.

The time it takes to design and build an extension can vary depending on the size and complexity of the project. On average:

• Small rear or side extension: Typically takes around 8 to 12 months to design and build.

• Larger extensions (e.g., double-storey): Can take anywhere from 12 to 24 months, depending on the complexity, approvals, and construction requirements.

Factors such as planning permission, design adjustments, contractor availability, and unexpected delays can impact the timeline.

Virtual Reality Architects…

Recent advancements in technology, particularly in virtual reality and visualisation software, have been fundamental in transforming the architecture industry and innovating the architectural design process!

At Cherry Architects, we offer a virtual reality experience to our clients within our service, allowing them to explore how spaces work throughout the whole design process and before anything is built. As we design primarily in 3-dimension, we are constantly considering how design is experienced beyond just the 2D layout.

What are the benefits of Virtual Reality in Architecture?

Experiencing what space looks and feels like

Virtual Reality allows us to accurately experience what it would be like to live and work in the architecture we design. Whilst 2D floorplans allow you to see the sizes and spatial configurations of design proposals, they do not communicate how tall spaces are, how bright they are and what it is like to experience a space in real time.

-Less costly design charges during construction

Virtual reality architects are able to take our clients on a journey through their future architecture. This means that there are less costly design changes during the construction process as the client has fully comprehended the constraints of the space, so there are no surprises when seeing it in real life on site.

-Experiencing space during different times of day and seasons

Just as demonstrated in Your Home Made Perfect, virtual reality architects can change the time of day and the seasons to show how the experience of being in a space will change throughout the day and year and design architecture to best serve that.

-Experimenting with different design options in real-time

Virtual reality serves as a tool for the client and architect to collaborate and discuss design choices. At Cherry Architects, we can change the design in real time, updating the model in front of our clients so that they can instantly experience what their suggestions would look like. Virtual reality allows us to experiment with different materials and colour pallets and to assess their effects on space before committing to a final design.

Take a look at this before and after
showing VR and the finished building…

Before

Before

After

After

Your Home Made Perfect Architects

The BBC’s popular ‘Your Home Made Perfect’ series has showcased to the masses the exciting opportunities that some architects are offering, involving virtual reality technology into the design process.

On Your Home Made Perfect, architects model their design concepts in 3-dimension then, putting on headsets, clients can place themselves into the space as if they are really there! Through viewing their new house extensions in 3D they can understand exactly what it would be like if the design were to become a reality.

As Your Home Made Perfect architects have demonstrated, regardless of budget, VR shows how their spatial problems can be solved through good design and clever layout strategies, which would be difficult on a 2D drawing.

Your Home Made Perfect

Types of Visualisation and
Virtual Reality in Architecture

Visualisation is not just about using VR headsets. There are many other effective ways of exploring space!

VR Headset

Virtual reality headsets are the most popular way of exploring virtual reality as they allow our clients to immerse themselves fully inside a room. They can move their head up and down and side to side and the view will respond as if they are standing in a space.

VR Headset

3D Panoramas

Our virtual reality architects use 3D panoramas to communicate design changes to clients remotely. We can send them links to updated models by email. By providing them with cardboard VR goggles to keep, they can open the link on their phone to look around the space. They can move their head and the view will respond as if they are standing in the space.

3D Panoramas

3D Walkthrough

At Cherry Architects, we find 3D walkthroughs to be the most effective way of communicating design to our clients. 3D walkthroughs allow you to understand the experience of moving through space.  We can open up a 3D model and move around it together on the screen, or send over a video from the 3D model capturing this experience.  By sitting around the screen and reviewing the design together, we can make progress with architectural design ideas.

3D Walkthrough

Still Visualisations

Still visualisations offer realistic still views from key positions within proposed spaces. They are a great way of showing a snapshot of how the space will look and how it will be used and their high resolution means that a lot of intricate details can be included down to the location of electrical sockets, furniture and lighting.

Still Visualisations

Types of Modelling

At Cherry Architects we work to two different levels of detail within our 3D modelling for Virtual Reality:

White Render

At an early stage of the design process, we model everything in white in order focus attention on the for, layout and flow of spaces. At this stage, we can establish how much glazing to add and how sunlight falls within the space.  

Depending on the design package selected, we may use White Render throughout the design process.

Detailed Render

When the design has developed sufficiently, our virtual reality architects start to explore materiality by testing out different materials and colours.  We can add specific products from window, lighting or flooring manufacturers to give a realistic view of how these would look in our architecture. We can even replicate personal touches, such as our client’s artwork, or specific pieces of furniture, to see how they would work in the space.